MG and baby....

And a proud Grandpa!

Not above you,
Nor below you,
But within you....
Nor below you,
But within you....
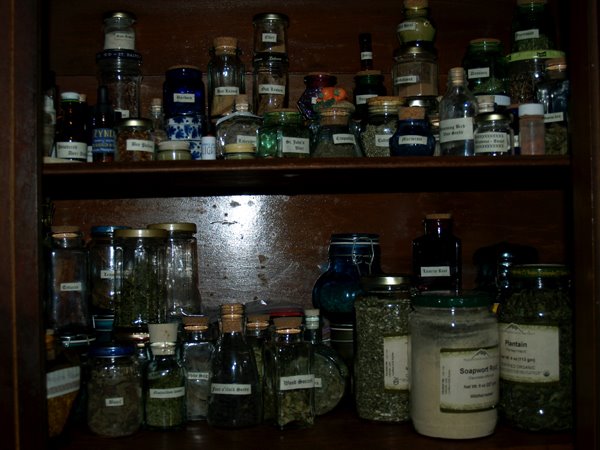 Above: The working herbal cabinet of GSW First Year, Nefabit (Salamanders House). This was submitted for an assignment in the herbology lesson of "Introduction to Magickal Healing." (Posted with permission)
 Above: Theban alphabet, submitted by GSW Second Year Xander (Stones Lodge) for the "Staff and Scroll" class. Xander's explanation:
"Also called 'Honorian' after it's inventor Honorius III (1216-1227), this is probably the most popular magick script used, even today. In fact, it is commonly called 'The Witches Alphabet.' I think it should more correctly be known as the 'Wizards Alphabet.' I was struck by the variety of both smooth and straight linework, but also the thick/thin factor. It really challenges the rules of type design, but within that it possesses an interesting flow--especially when treated with a calligraphic touch (changing the baseline, blending some together, etc.)."Xander invites readers to decipher the coded message underneath the font "keyboard." (Posted with permission)

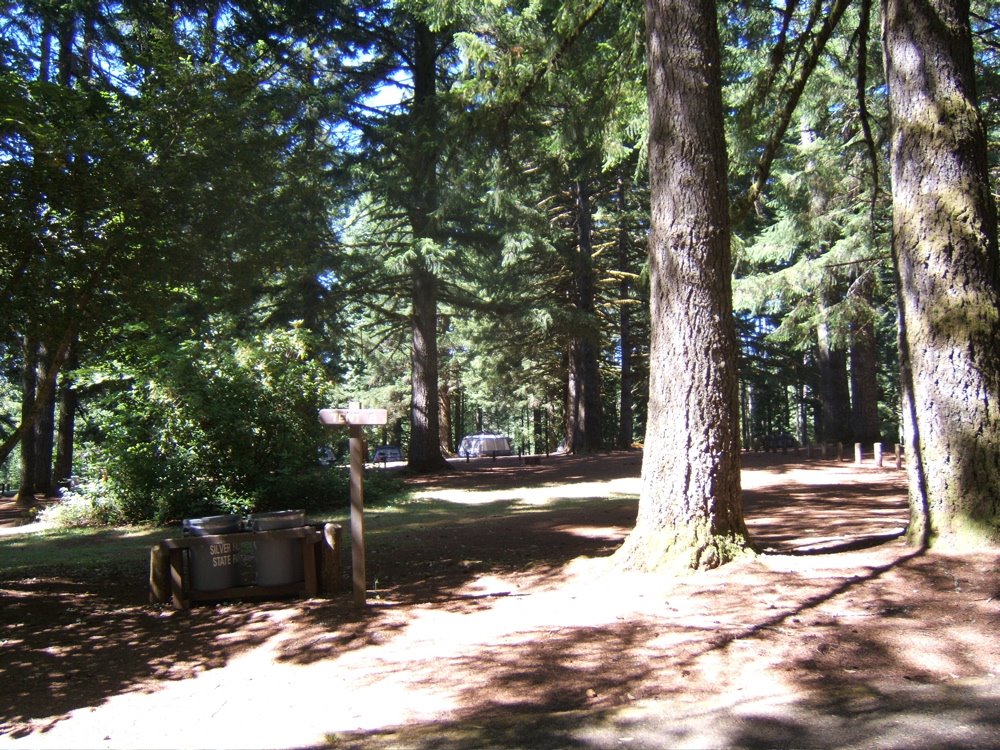 Above is a look into Tent Site B (one of our two group sites). The sites are HUGE! Rather than distinctly separate tent sites, there are large spaces, allowing Conclavians to pitch camp pretty much wherever they wish. Fire pits are scattered around, and water and trash are nearby (we also have our own recycling station). Picnic tables are all over the sites and can be moved as needed. The campsites are well off the road and very, very quiet. We’re also well away from any water, which should keep the mosquitoes at a minimum.
 Here’s our Day Lodge, which is next door to Group site B. This is where the closest bathroom is, too! The other bathroom is a short walk down the camp road, within eyesight of Group Site A. We peered in the Lodge windows (it was locked) and found tables, chairs, and a fireplace with a huge stack of firewood.
 This is the forest as seen from behind the Day Lodge. It’s a typical Cascades Doug-fir and hemlock forest, with understories of ferns, salal, and vine maple. It smells amazing!
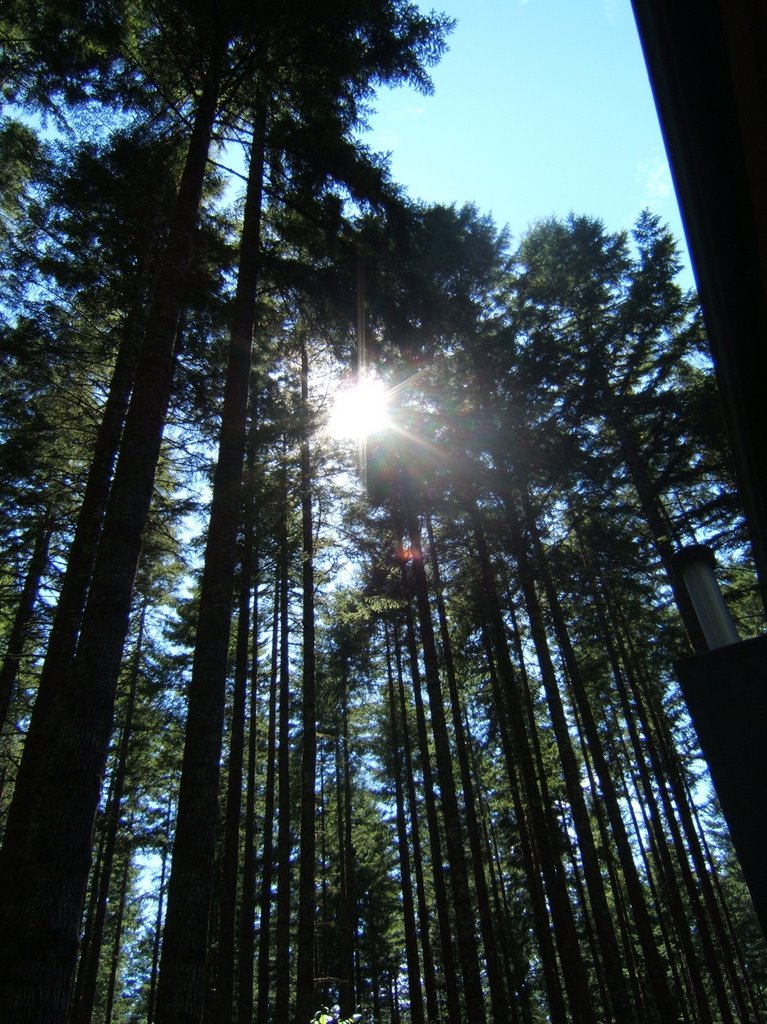 And here are the trees, if you tip your head back!
 Here is a picture of North Falls, seen from the highway overlook. Our hike will take us past this falls at close range.
 This topic will show the work that I am doing as a student for this class. It’s from the Dept. of Wortcunning, taught by Prof. Barrette. It’s one of three gardening classes I’m working on right now.
Each plant has a magical resonance associating it with a particular Element. An Elemental garden presents a collection of plants all relating to the same Element, along with decorations that support the theme. In this Class, you will learn about Air gardens and Fire gardens. Expect this to take 2-3 months. You need a bit of outdoor space to grow one modest-sized garden (you may choose which Element to cultivate), suitable gardening tools, and a camera (digital, or film and a scanner) to take snapshots.For this class, I've already begun a "fire garden" for the back, south-facing deck. I started near the end of June; here are some photos tracking my progress.
 Here’s my potting bench, loaded down with herbs and dirt, ready to plant the kitchen garden.
 Here’s the pot with the roots all dug out and rosemary whacked back and fresh soil and food worked in.
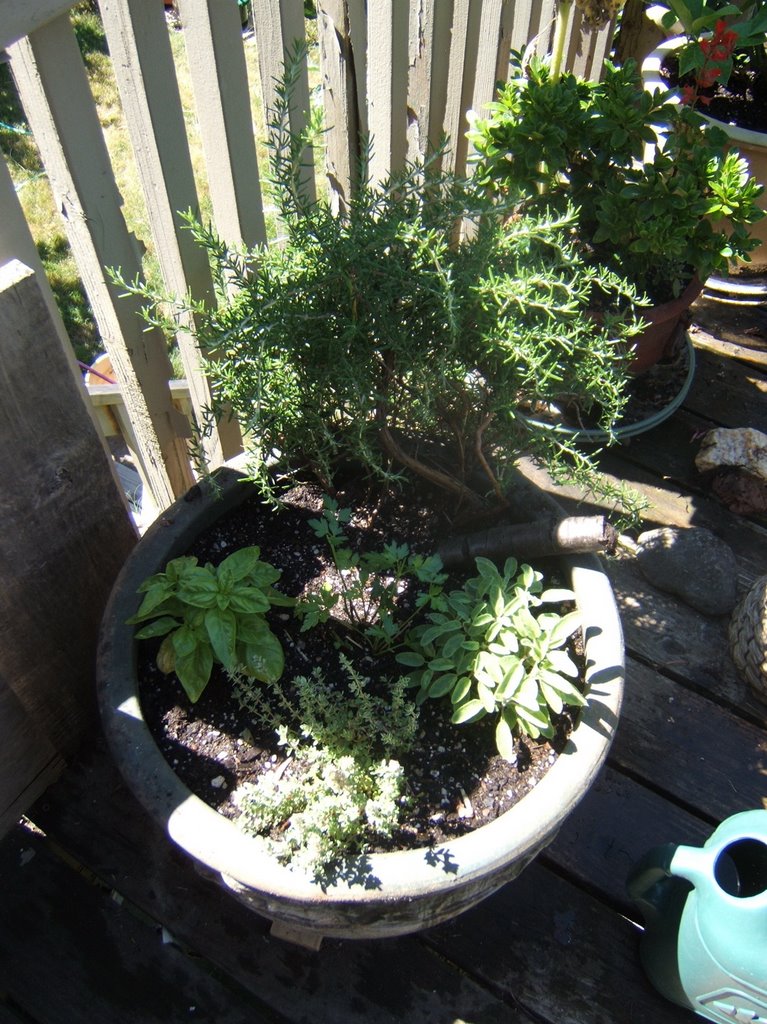 As of July 8, this was the newly-planted kitchen garden. The rosemary was trimmed way back, and I added small basil, parsley, thyme, and sage starts.
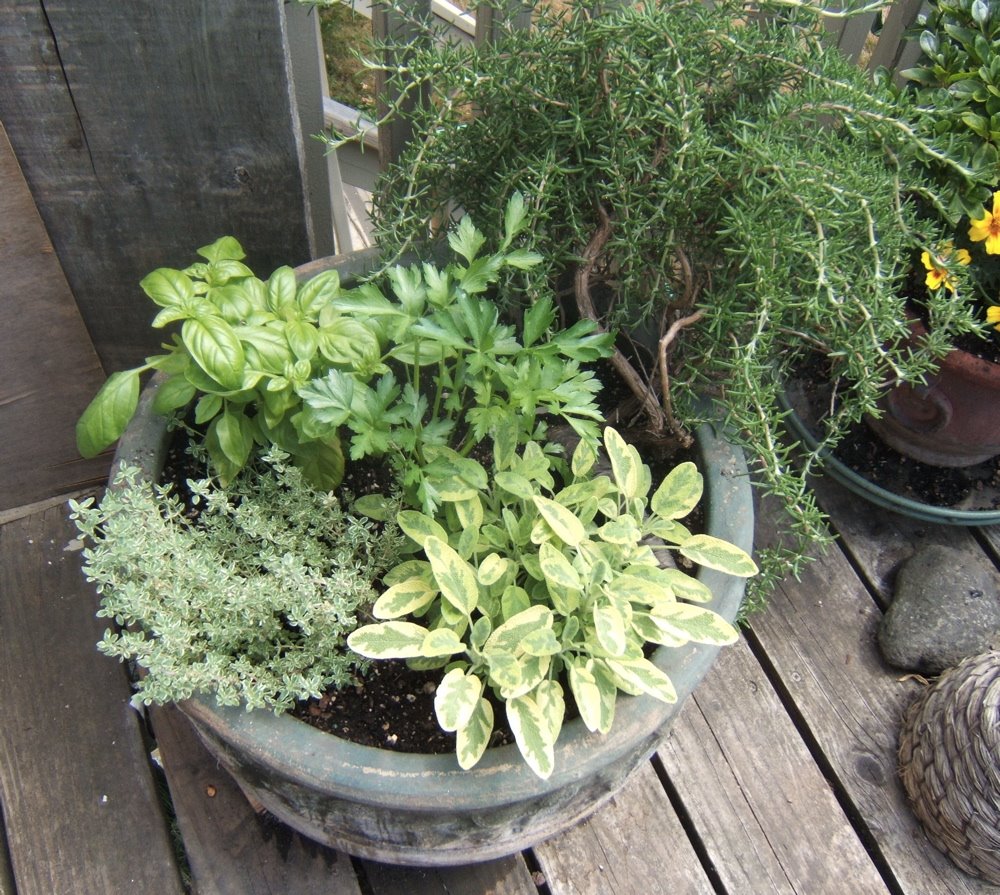 Here is the same pot on July 31. You can see how the herbs have taken off! In fact, I’ve already cut back the basil and parsley twice. My kitchen is 10 feet away, and I use these herbs in my everyday cooking. I’ve even made a batch of pesto. Here’s my favorite pesto recipe:
 Note the sun plaque hanging on the deck—I found it under the potting bench—had forgotten about it. A perfect addition to a fire garden!
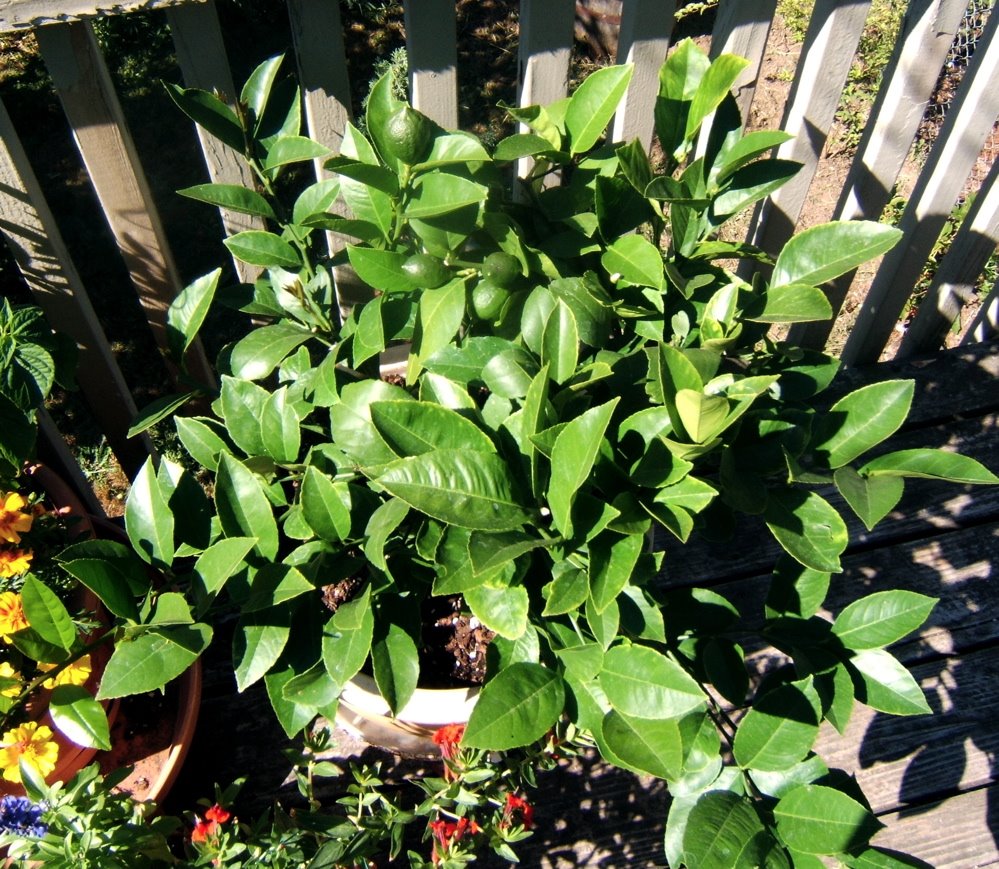
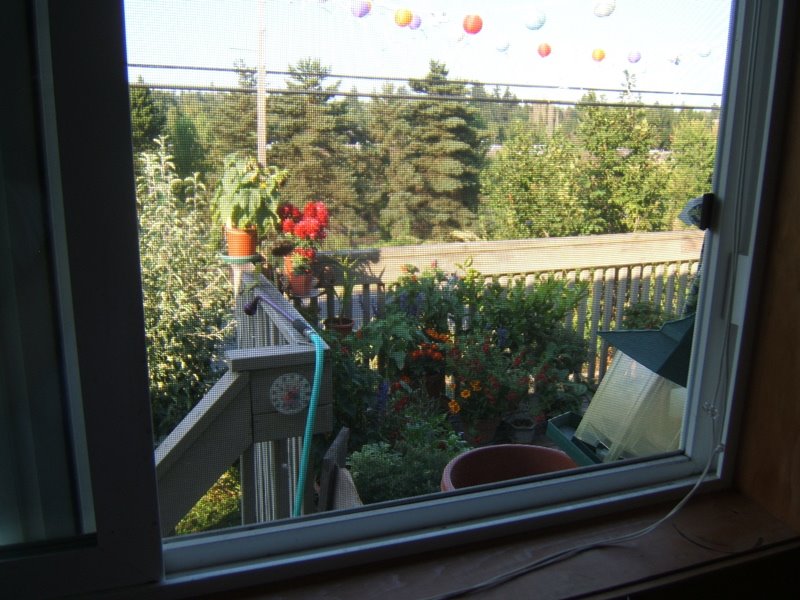
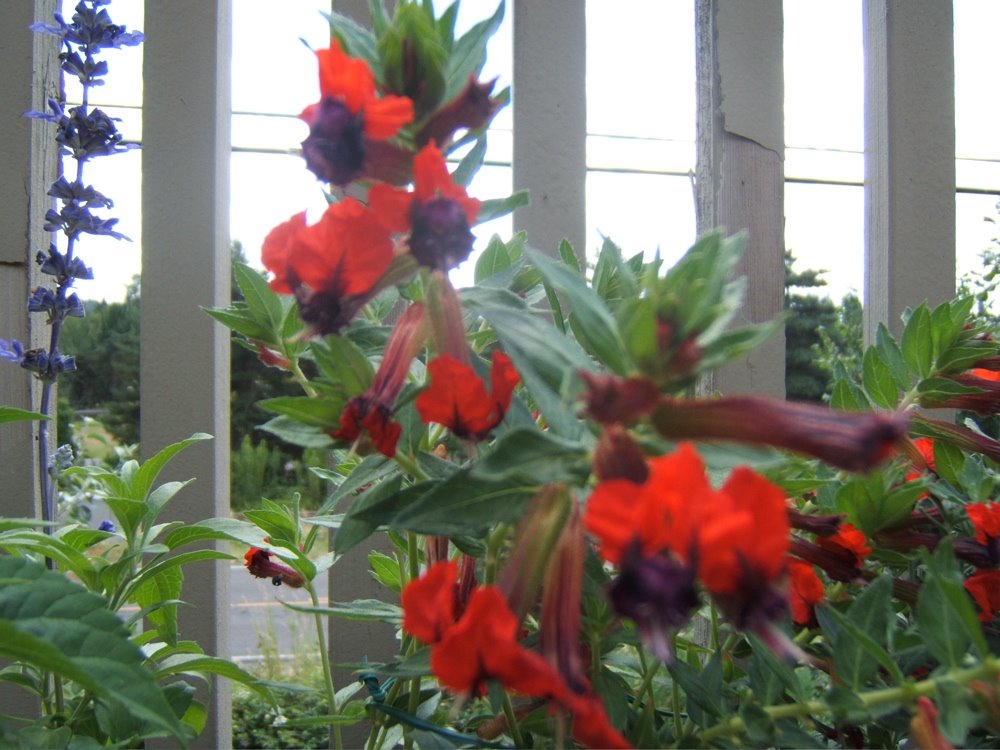 At right is a special flower that I bought at our Farmer’s Market specifically for the fire garden. Its flowers reminded me of flames. Details to follow.
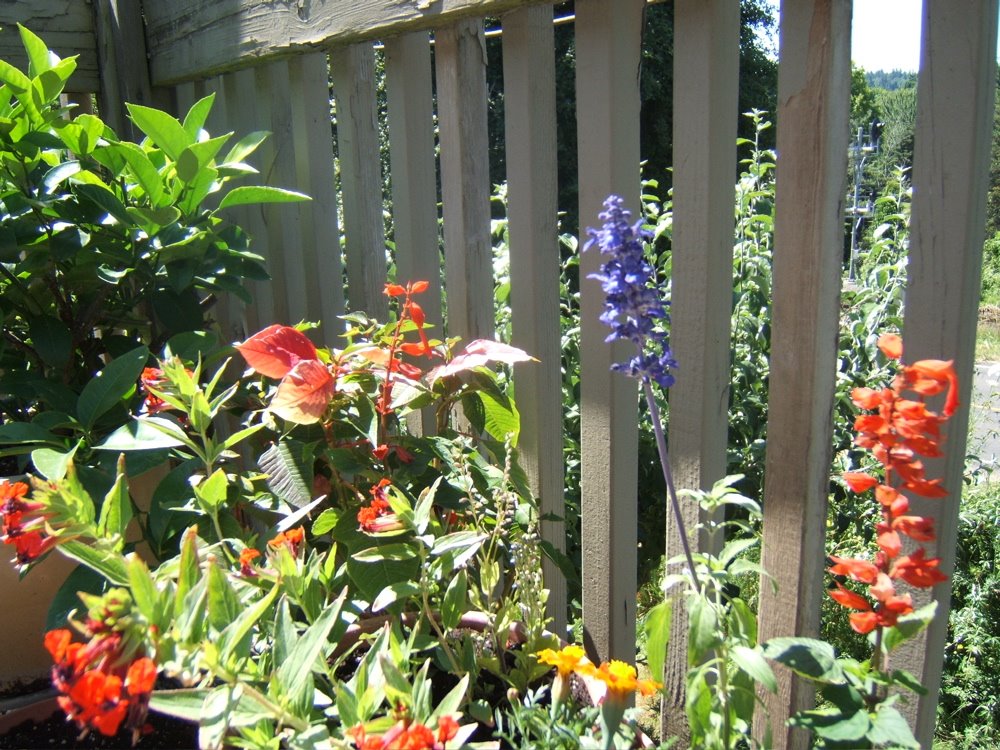 The same day that I planted the pots, I was looking at them from my kitchen window and saw a brilliant green Anna’s hummingbird flitting from flower to flower! An unexpected gift. I took this “hummer view” (above) of what the flowers must have looked like to the tiny bird.
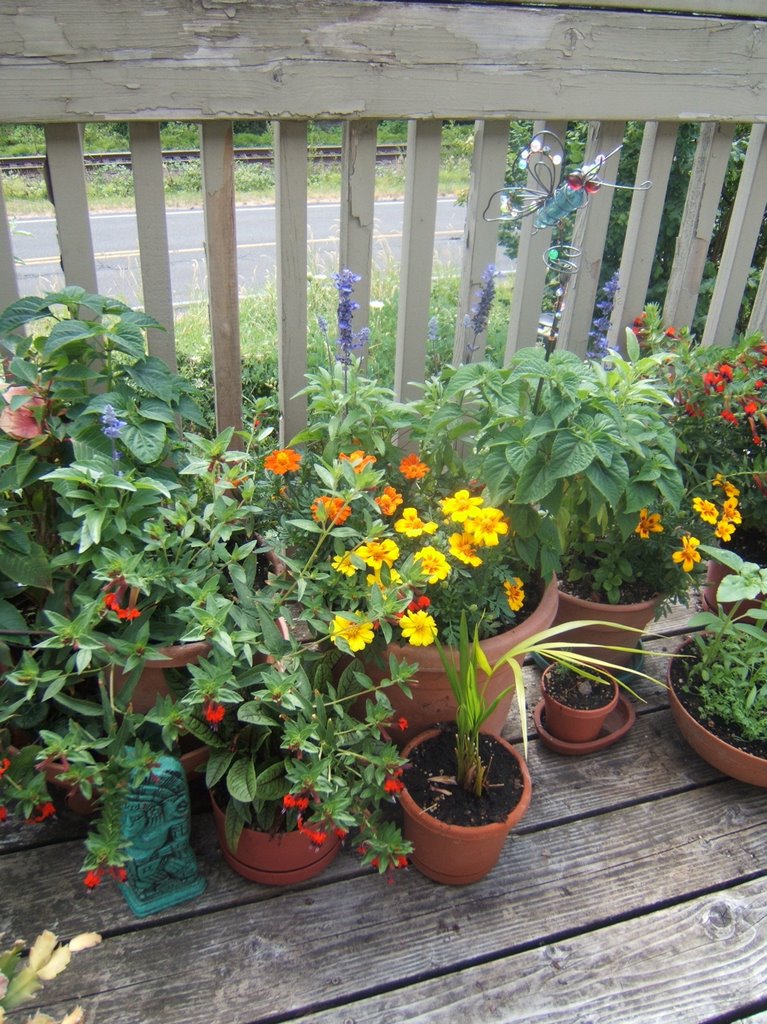
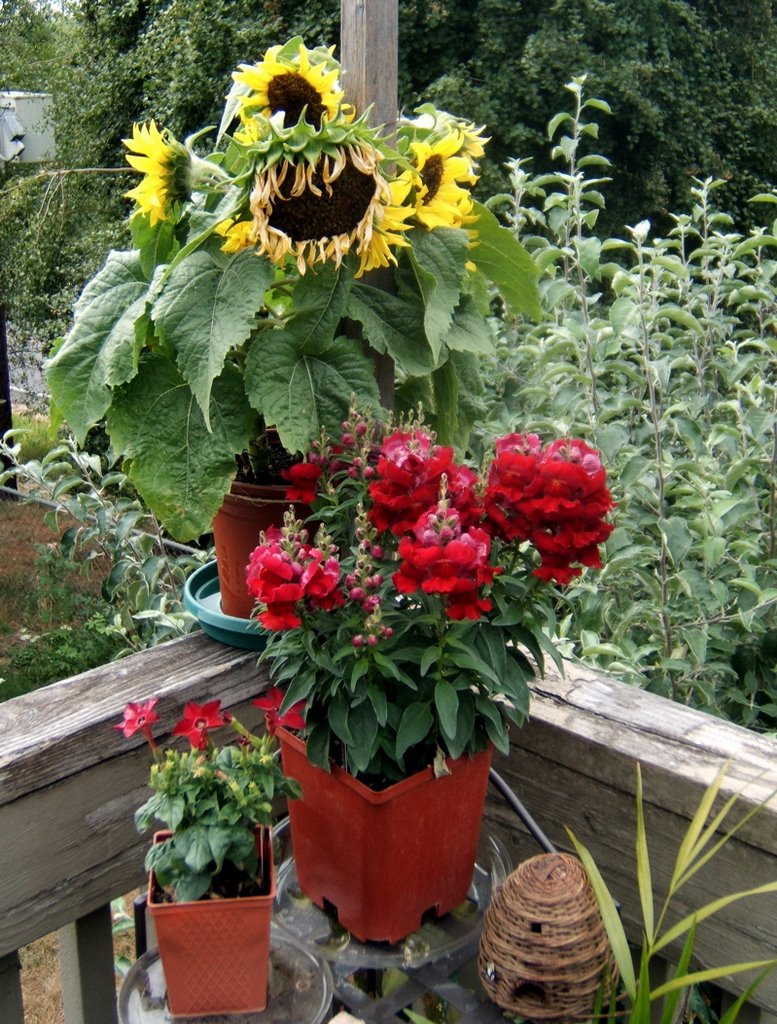
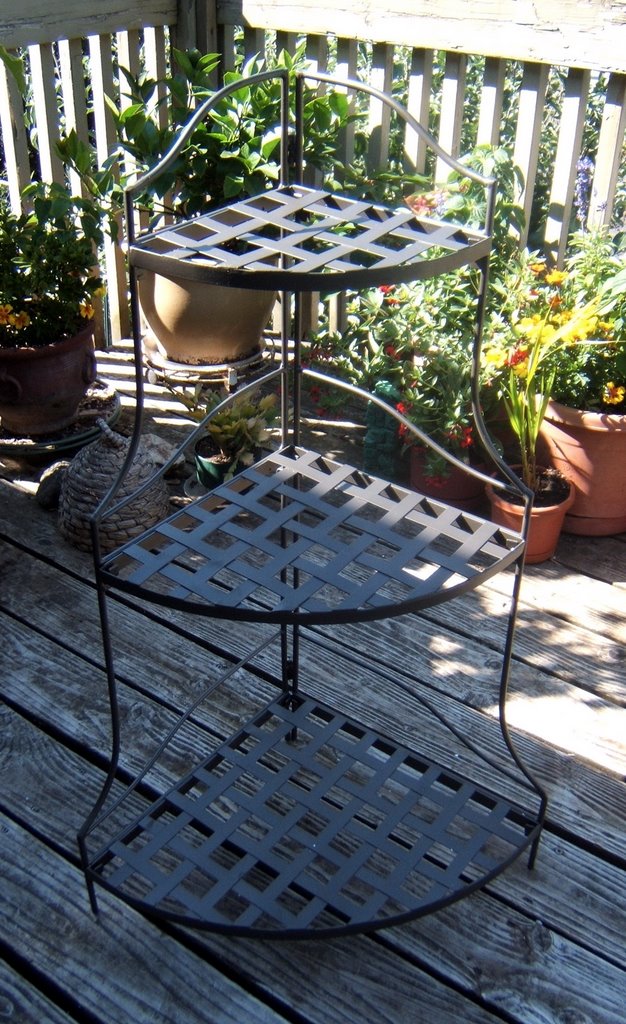 On July 28, I went to Lowes and spent $20 on a three-tiered plant stand I’d seen there a couple of weeks ago. I figured it would help add some vertical “lift” to the garden and would help me display the plants to their best advantage. I also bought a potted sunflower and some wine-red snapdragons, all of which were on sale. There isn’t anything sunnier or summerier than a sunflower, si? Ditto for snapdragons, which would also add fiery spikes to the display.
 Today—July 31—I decided to “assemble” the garden. It took me about an hour to arrange everything, and I’m very pleased with how it worked out. The garden is in a sort of open triangle—very flame-like. In fact, it makes a triangle that, with the help of the plant stand, points up, which mimics the elemental symbol for fire (right). The triangle also evokes the trinity of womanly magick (maiden-mother-crone) which makes me happy.
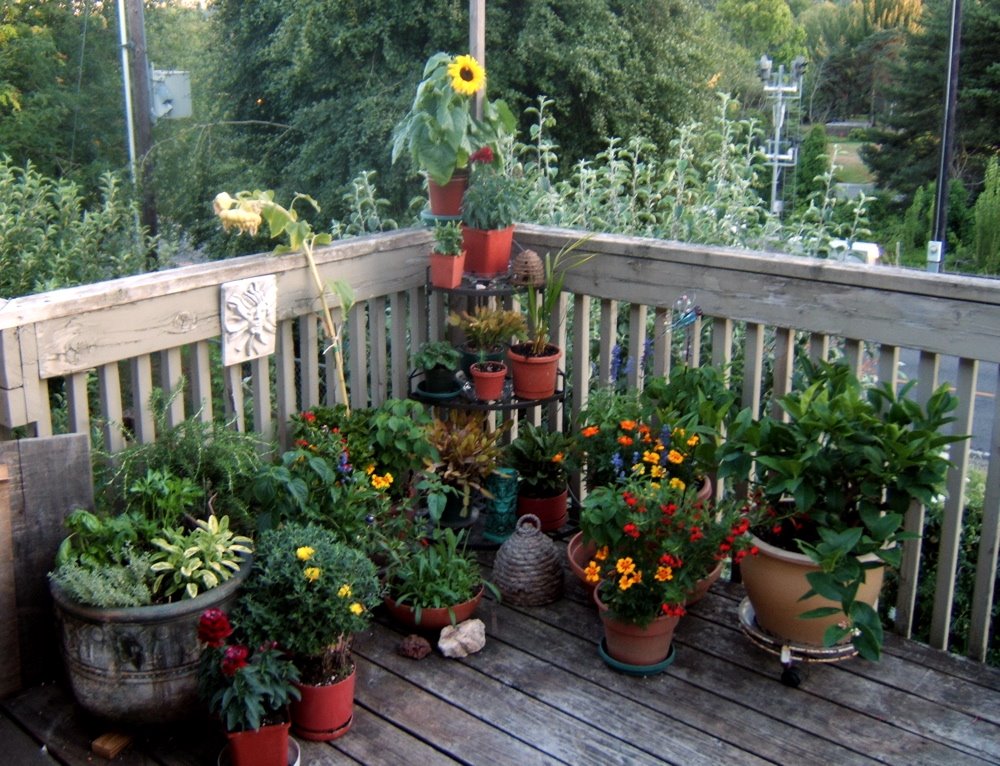


 By the way--I learned something new: the xeriscaping movement has its own logo (left). Actually, the logo and the word "xeriscaping" are registered trademarks of the Denver Water, the City of Denver's Water Department! Who'd guess?
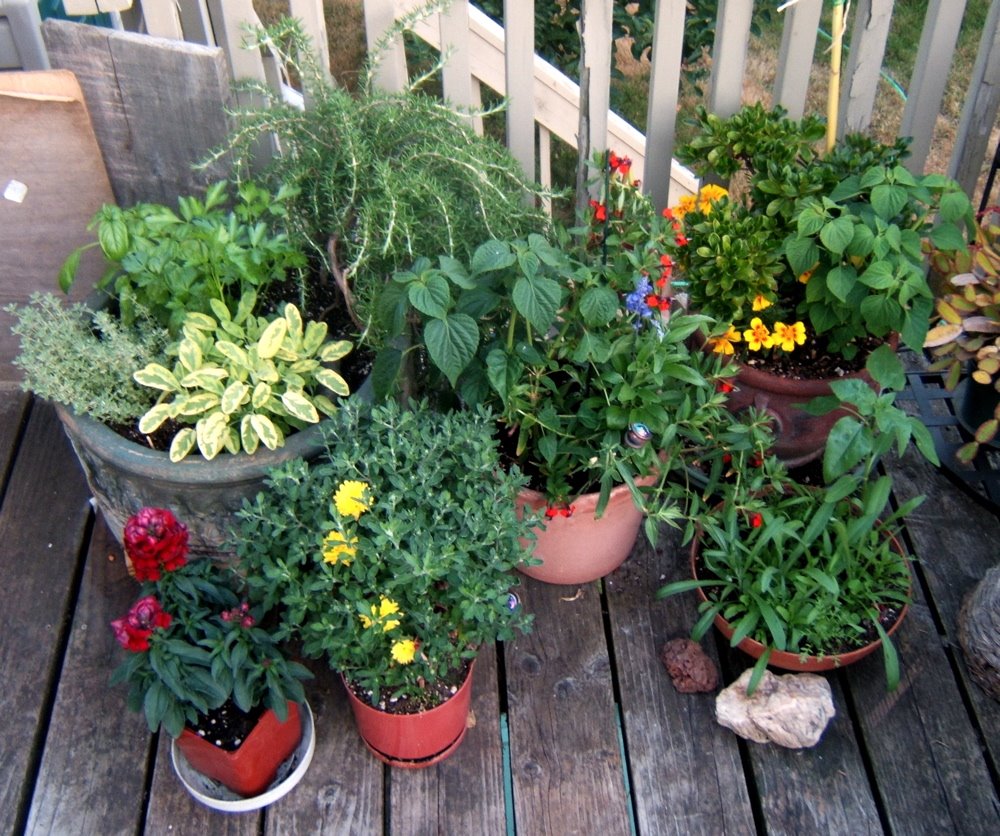
 Here's the right-arm grouping. Details on the component plants later. Note the metal-and-glass butterfly "sculpture" in the upper left, also shown here at right.
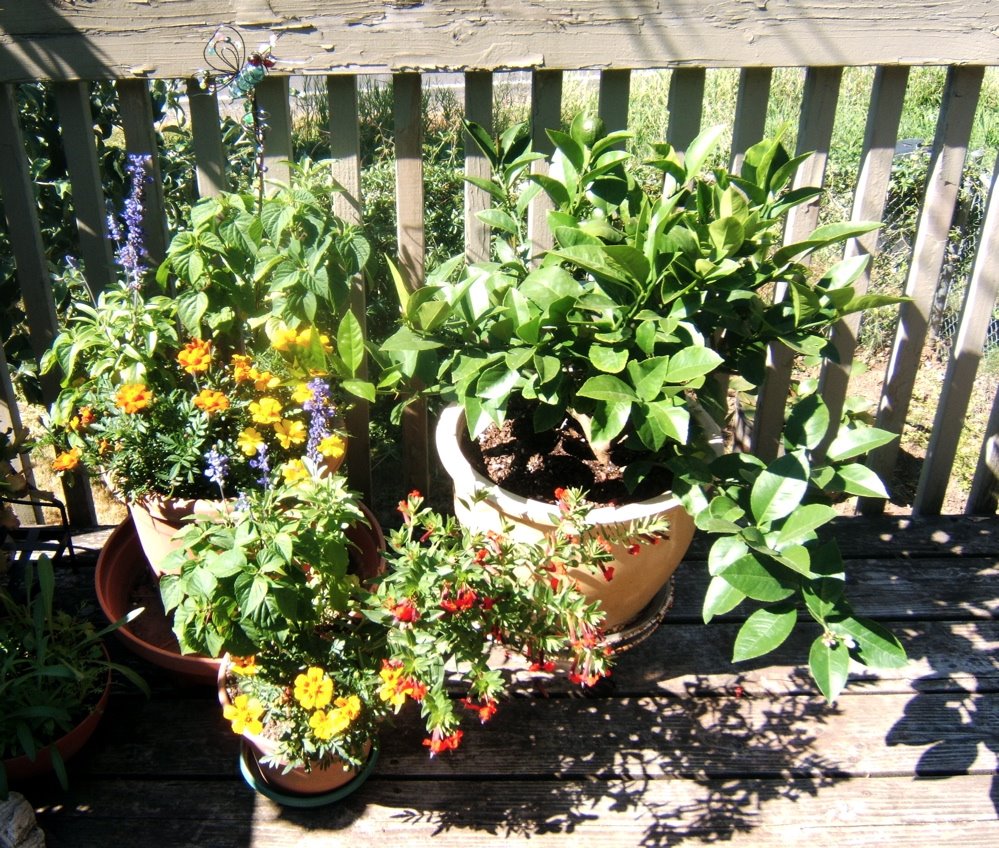


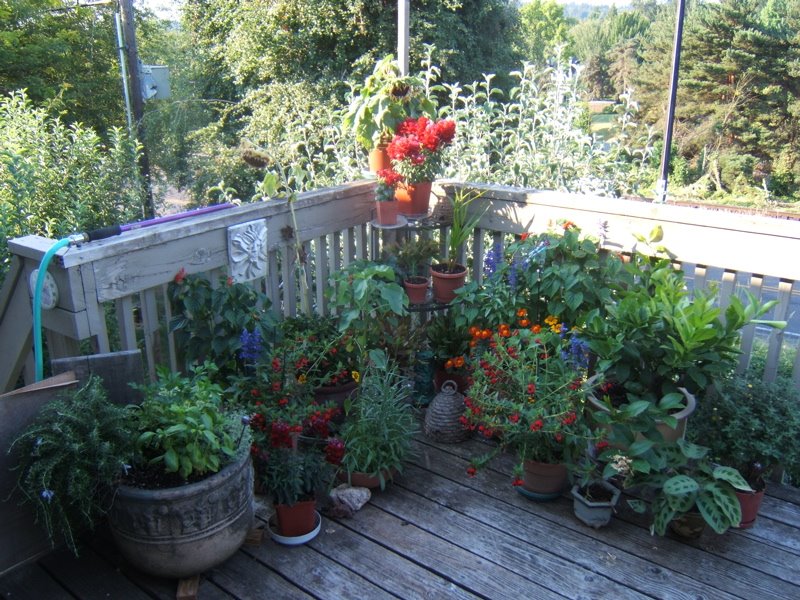

 Here's the garden on August 26, exploding in bloom:
 I've learned a lot about pruning. All of these flowers have responded to careful pruning by putting out even more blossoms. Notice in the August 26 shots how the salvia have returned! they're sending out brilliant red spikes of flowers--very fiery!
 Bill and I were installing a different water feature in the side yard, and found ourselves with an extra pump and now use for it. I thought it would be lovely to add a small water feature to my fire garden-- not onyl for aesthetics but to sort of balance the heat off the fire. We went to Lowes and Bill bought me a beautiful red ceramic pot, to blend in with the fire garden. At home, we added a clay flowerpot (set upside down over the pump, on the bottom of the red clay pot) and some river rocks, and voila! At left is a closer view.
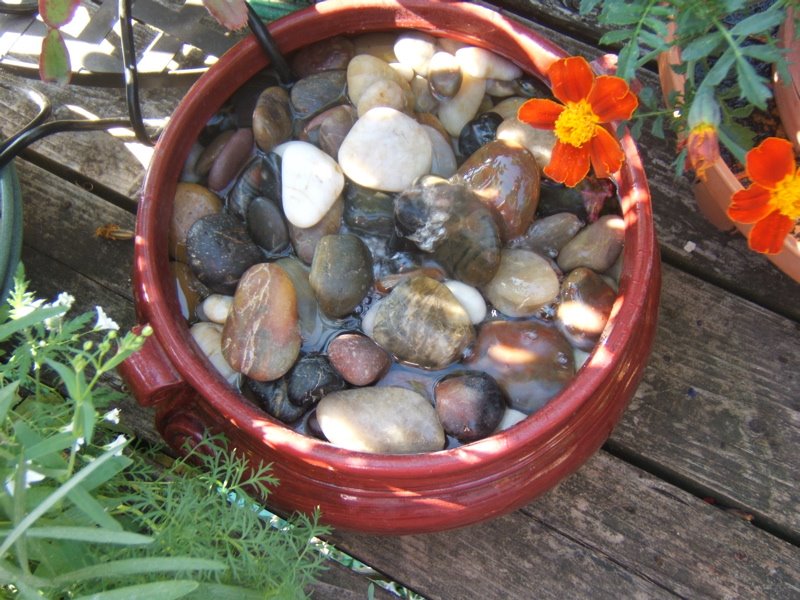 August 31, 2006. The last day of August seems a fitting date to bring my comments about this garden to their formal end.
 This topic will show the work that I am doing as a student for this class. It’s from the Dept. of Wortcunning, taught by Prof. Barrette. It’s one of three gardening classes I’m working on right now.
Each plant has a magical resonance associating it with a particular Element. An Elemental garden presents a collection of plants all relating to the same Element, along with decorations that support the theme. In this Class, you will learn about Water, Earth, and Spirit gardens. You need a bit of outdoor space to grow one modest-sized garden (you may choose which Element to cultivate), suitable gardening tools, and a camera to take snapshots.For this garden, I'll be installing a spiral labyrinth in the side yard.
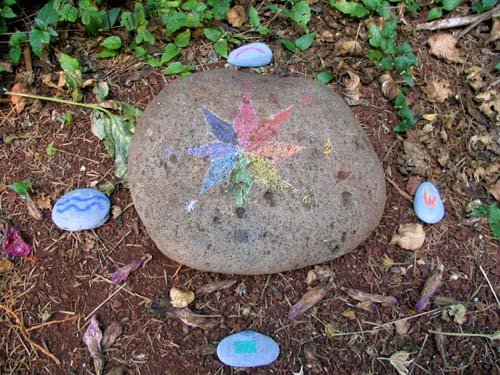
"I decided I would like to keep my altar simple. Cluttered altars get on my nerves. For instance, my main altar, which is in my room, simply has two candles (of color corresponding to my goals or emotions of the time) an offering plate, a dragon statue and elemental representations. So I thought about what I wanted to do for the green one. I know I wanted it to be outside, and that made some restrictions. I can't have anything that will blow away (we always have high winds here) or be damaged by rain and sun. So that required something even more simple. So I started by going out back and finding one of the flat volcanic rocks that was in our garden. I found a nice one that was about ten inches across, and then selected four smaller ones. I got my colored pencils (they are waterproof) and drew the symbol my Mom and I have come up with, that is waaaay to intricate and involved to even begin to describe here. Then I drew elemental symbols on the smaller ones, and placed them around the main altar. I decided to place the setup on the side of my house near my garden. (Which is very small - just potatoes, tomatoes, nasturtiums and dill) The place was sheltered and shady, and so served as a good place to setup. I may add more to it later. For instance, if I find a nice branchy stick, I may stick it in the ground and decorate it with seasonal objects. I'll look for one today before I take the picture to send to Professor Moonwriter. ^_^ "

 Symbol of the Air element (below):
 Symbol of the Fire element (below
 Symbol for the Water element (below):
 Symbol for infinity:
 Symbol for yin-yang: